Are you looking for how to crochet a granny square? This blog will help you and tell you about it in detail. Crocheting is an enjoyable and relaxing activity that offers a great deal of satisfaction. With the right tools and some patience, it’s easy to create beautiful pieces of work with crochet. A classic crochet pattern is the granny square, which is often used as the basis for larger projects or worn as a standalone piece of art. In this article, we’ll explain how to crochet a granny square step-by-step so you can enjoy making your own crocheted creations.
What is a Granny Square?
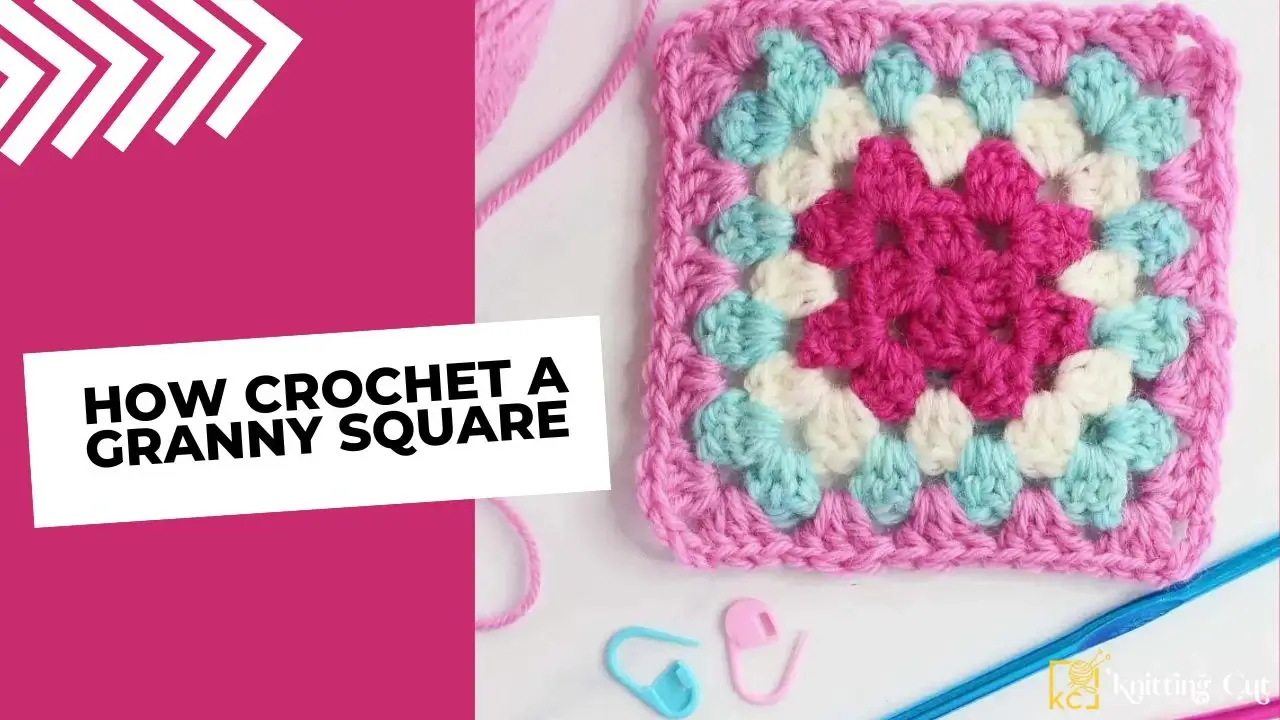
Granny Square is a type of crocheting design that has been around for decades. It is one of the most versatile crochet patterns, and it can be used to make a wide variety of items such as blankets, scarves, bags, and even clothing. The Granny Square pattern typically consists of several rounds made up of clusters of double crochet stitches separated by chain stitches. Granny Squares have been popularized through generations because they are compact and portable. You can easily carry them with you wherever you go and work on them during your free time.
Materials Needed
Granny squares are a classic crochet pattern that can be used to create a wide range of projects. First and foremost, you’ll need yarn in your desired colors. Granny squares typically use multiple colors, so consider choosing a palette that complements each other well. You’ll also need a crochet hook in the appropriate size for your chosen yarn weight. A good rule of thumb is to choose a hook that’s slightly smaller than what’s recommended on the yarn label for tighter stitches.
In addition to yarn and hooks, you may want to invest in stitch markers or safety pins to help keep track of where each round begins and ends. A pair of scissors is also essential for cutting yarn as needed throughout your project.
Also Read: How To Weave In Ends Crochet
Steps for Granny Square
The following steps must be in mind during crocheting the granny square which is under as:
Step 1: Make a Magic Ring
To make a magic ring granny square, first, gather your supplies yarn, and a crochet hook. Then create a loop with your yarn, leaving an extra tail of about 6 inches. Hold the loop with your thumb and forefinger while taking the long end of the yarn over your fingers from back to front. Next, insert your hook into the loop from front to back before pulling up another loop through it.
Step 2: Create the Chain Stitches
To create this stunning design, all you need is some yarn and a crochet hook. The basic shape of the chain stitch’s ring square is similar to that of a traditional granny square, but with an added circular center made entirely from chains. This creates a unique focal point for your design that’s sure to impress. The great thing about this pattern is that it’s fairly simple to master once you get the hang of it.
Step 3: Increase in Each Round
Increasing in each round means adding more stitches on top of the previous round. This creates a larger square each time and allows you to make your project bigger without having to start over with a new square. It’s also a fun challenge for those who enjoy testing their skills and pushing themselves creatively.
Step 4: Fasten Off the Final Round
Fastening off the final round of a granny square is an essential skill for any crochet enthusiast. Whether you’re making a blanket, scarf, or coaster, knowing how to fasten it off properly will give your project a polished and professional look. In this article, we’ll explore the steps involved in fastening off the final round of a granny square.
The first step in fastening off is to complete the last stitch of your final round. Next, cut your working yarn leaving about 6 inches of tail. Then, the thread that tails onto your tapestry needle and weaves through the top loops of your last stitch. Make sure to weave back and forth several times to secure it in place before trimming any excess yarn.
It’s important to note that when fastening off a granny square with multiple colors, you’ll need to switch colors before completing the last stitch.
Tips and Troubleshooting
Firstly, when starting your granny square, make sure to keep the tension consistent throughout the entire piece. Uneven tension can cause the square to warp or become misshapen.
Secondly, pay attention to your stitch count as it’s easy to lose track of how many stitches you have worked in each round. A missed stitch could throw off the entire pattern.
Additionally, changing colors in your yarn can add interest and dimensionality but be sure to weave in loose ends as you go instead of waiting until the end of your project.
Conclusion
Crocheting a granny square is a wonderful project for both beginners and experienced crocheters alike. With the simple steps outlined above, anyone can learn how to make their own unique granny square. Whether you plan on using your finished product as part of a larger item or simply keep it as a standalone decoration, the simple pleasure that comes with creating your own handmade crochet piece cannot be overstated.
Also Read: Is Crochet Faster Than Knitting