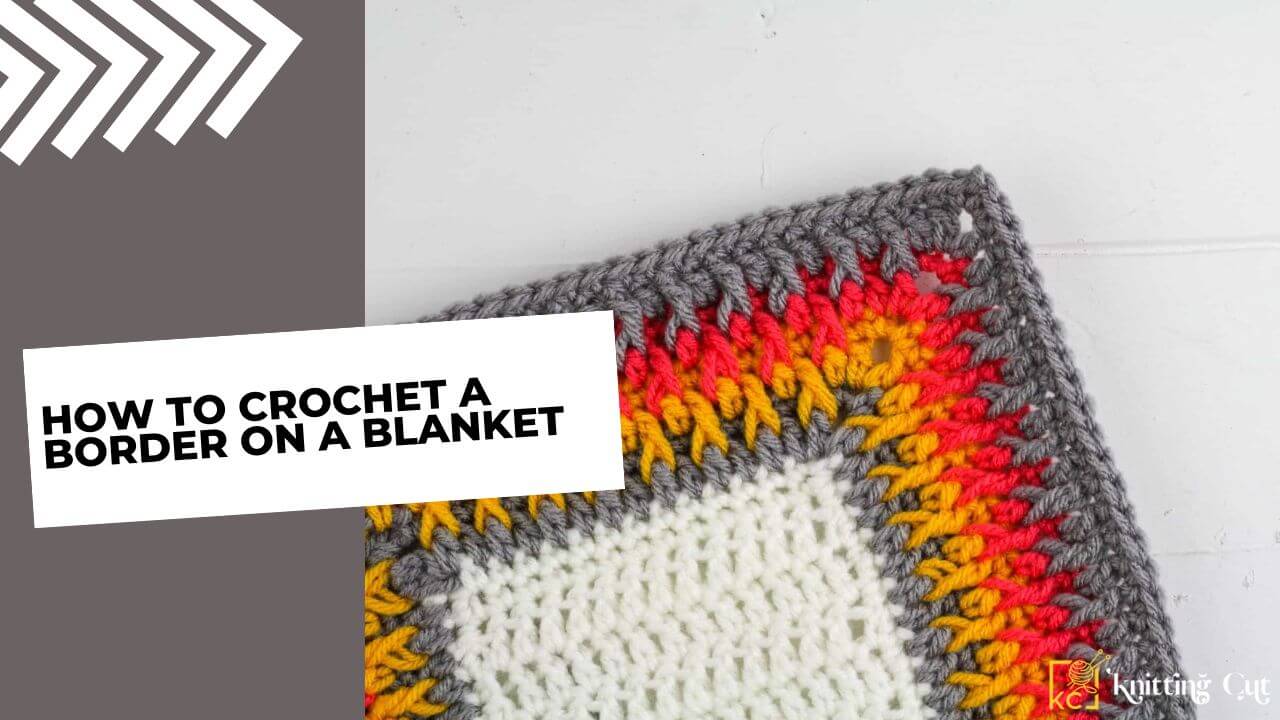
To crochet a border on a blanket, you can use a single crochet stitch. Start by making a slip knot and then insert your hook into the first stitch of the blanket. Yarn over and pull through both loops on your hook. Continue this process all the way around the blanket until you reach the beginning. Slip stitch into the first single crochet stitch to join the round. You can also use other stitches like shell stitch edging or peephole border.
Crocheting a blanket is a creative, tactile endeavor that many find relaxing and fulfilling. Once you’ve finished your blanket, you may decide to add a finishing touch by applying a crochet border. This extra detail helps frame your work, adding a unique final flourish that enhances the overall aesthetic. In this article, we will delve into the steps needed to crochet a border on a blanket.
Choosing the Right Border
While the process of creating a crochet border is quite straightforward, deciding which style to use can be a tougher decision. There are numerous crochet border designs, from simple single-stitch patterns to intricate lace-like edgings. Some common border choices include:
- Shell stitch: Ideal if you’re after a decorative, scalloped look
- Picot edging: Delivers a beautifully crafted, ornamental border
- Crab stitch: Also known as reverse single crochet, provides a rope-like edge.
Materials You’ll Need
To crochet a border on your blanket, you’ll need:
- A crochet hook: The size should correspond to the weight of your yarn.
- Yarn: While it’s common to use the same yarn as your blanket, you can experiment with different colors or textures for a contrasting border.
- Scissors: For trimming your yarn.
- A yarn needle: Perfect for weaving ends of your yarn.
Creating Your Crochet Border: Step-by-Step
Step 1: Start with the basics – No matter how complex your chosen border pattern might seem, you always start with a base round of single crochet.
Step 2: Correctly position your work – When adding a border, always crochet in a counterclockwise direction. For right-handed crocheters, the right side of your blanket should face you.
Step 3: Attach the yarn – Begin at a corner and insert your crochet hook into the blanket’s stitch. Secure the yarn on your crochet hook with a slipknot, and pull the loop through the stitch. Yarn over and pull through the loops on the hook to create your first single crochet.
Step 4: Single crochet all the way around – Single crochet in every stitch. Three single crochets are typically done in each corner to fully cover the edges.
Step 5: Join the round – When you reach the point you started, join the round with a slip stitch in the first single crochet.
Step 6: Adding more rounds – If you prefer a thicker border, you can add more rounds of single crochet, or start your chosen border pattern.
Step 7: Weave in your ends – When finished, cut your yarn and weave in the ends using a yarn needle.
Common Mistakes and How to Avoid Them
Regardless of whether you are a beginner or an expert, mistakes can happen. Here are a few common ones to avoid with tips for sidestepping potential pitfalls.
- Uneven edges: It’s essential to maintain consistent tension when crocheting borders to avoid uneven edges. Regularly checking your progress can help catch any unevenness early.
- Curling Borders: If you notice your border is curling, you may have too many stitches. It’s best to unravel your work and reduce the number of stitches.
- Bulky corners: To prevent overly bulky corners, ensure you don’t overcrowd the corner stitches.
Conclusion:
Crocheting a border on a blanket is a gratifying process that enhances your finished piece. With these comprehensive steps, from selecting materials to a step-by-step guide, along with common pitfalls to avoid, we’re sure you’ll master the art of crocheting a border. Regardless of the design you choose, keep practicing, testing different yarns and stitches, and most importantly, enjoy the process! Your beautifully bordered blanket will be the perfect cozy addition to your living space, or a thoughtful, handmade gift.
Also Read: Is Crochet Easier Than Knitting