Knitting is not just about creating flat surfaces; it’s an art that allows you to add curves and slopes seamlessly. One powerful technique for achieving this is through the use of short rows. In this article, we’ll explore the fundamentals of short rows, their applications, and a crucial skill wrap and turn in knitting.
What are Short Rows?
Short rows, as the name suggests, are rows that are shorter than the preceding ones. But how do you create them? It’s simple: just turn your work over before reaching the end of the row. Imagine having 20 stitches on your needles and knitting only 16 before making that turn.
The Gap Challenge
However, a basic turn can leave your knitting with unsightly gaps at the turning points. This is where the wrap and turn technique comes into play, offering an elegant solution to this problem.
Read More: Knitting Patterns Scarf With Sleeves
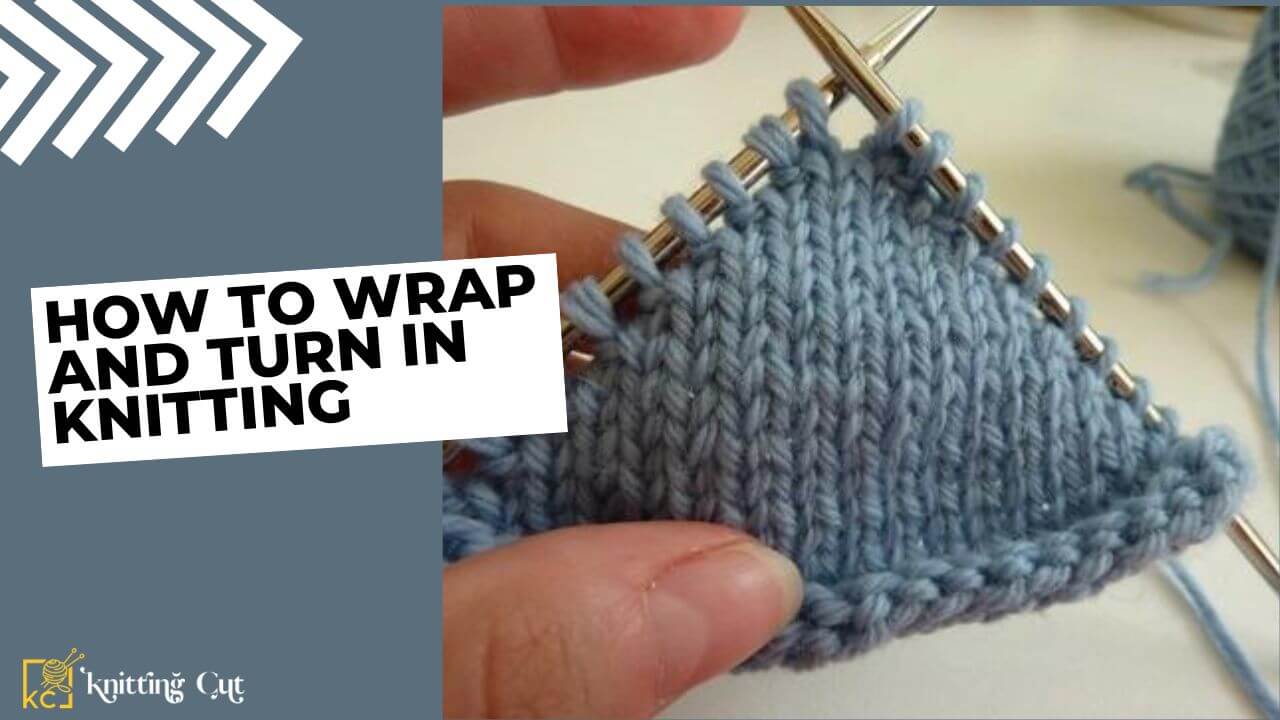
How to Wrap and Turn in Knitting: 4 Method
The wrap and turn method involves wrapping the working yarn around the neighboring stitch during the turn to close the gap effectively. Let’s break down the process for both knit and purl sides.
Wrap on the Knit Side
- Knit to the point where you will wrap and turn. Bring the yarn to the front between the needles.
- Slip the next stitch from left to right needle, purlwise.
- Bring the yarn to the back between the needles.
- Slip the stitch from right to left needle.
- Turn, and now you’re ready to purl.
Pick up on the Knit Side
- Knit to the wrapped stitch, identifying the wrap as a small bar across the bottom.
- Insert the right needle tip into all wraps from bottom to top.
- Slip all wraps plus the stitch to the right needle.
- Knit all wraps and the stitch together.
Wrap on the Purl Side
- Purl to the point where you will wrap and turn, keeping the yarn in front.
- Slip the next stitch from left to right needle, purlwise.
- Bring the yarn to the back between the needles.
- Slip the stitch from right to left needle.
- Turn, and now you’re ready to knit.
Pick up on the Purl Side
- Purl to the wrapped stitch, identifying the wrap as a bar wrapped around the bottom.
- Lift the wraps onto the left needle.
- Purl all the wraps and the stitch together.
Short Rows in Action
Short rows are partial rows that allow you to shape specific areas of your knitting. Whether it’s for the shoulders of sweaters, sock heels, or adding a subtle curve to garments, mastering short rows is a valuable skill.
Working Wrap and Turn on Both Sides
Short row knitting often involves working on both the knit and purl sides. While the overall concept remains consistent, the technique varies slightly. Learn how to handle both situations for a smoother knitting experience.
At some point, you’ll need to knit or purl across all the stitches, encountering the wrapped stitches.
Knitting Up Wraps
- Insert the right needle tip under the wrap, then into the wrapped stitch.
- Work wrap and stitch together.
Purling Up Wraps
- From the back, insert the right needle tip under the wrap and lift it onto the left needle.
- Insert the right needle through the stitch and wrap, then work stitch and wrap together.
Conclusion
You’ve embarked on the journey of mastering short rows and the wrap and turn technique. This skill opens up a world of possibilities in your knitting projects, allowing you to add flair and shape with precision