Yarn guide rings are gaining popularity for their affordability, aesthetic appeal, and practicality in yarn-related crafts. Acting as a helpful tool to manage yarn during knitting or crocheting, these rings, also known as crochet rings, can enhance your crafting experience. Let’s delve into the world of yarn guide rings, exploring their benefits, usage, and options available in the market.
What is a Crochet Tension Ring?
A crochet tension ring, also known as a yarn tension ring, is a miniature tool designed to aid in maintaining consistent tension while crocheting. Resembling a regular finger ring, it serves the purpose of holding and guiding the yarn throughout the crafting process. Typically crafted from metal, these rings may feature notches or ridges to secure the yarn in place. Some are adjustable for a personalized fit, while others are made from non-adjustable materials like plastic.
How to Use a Crochet Ring
To use a yarn guide ring effectively, follow these simple steps:
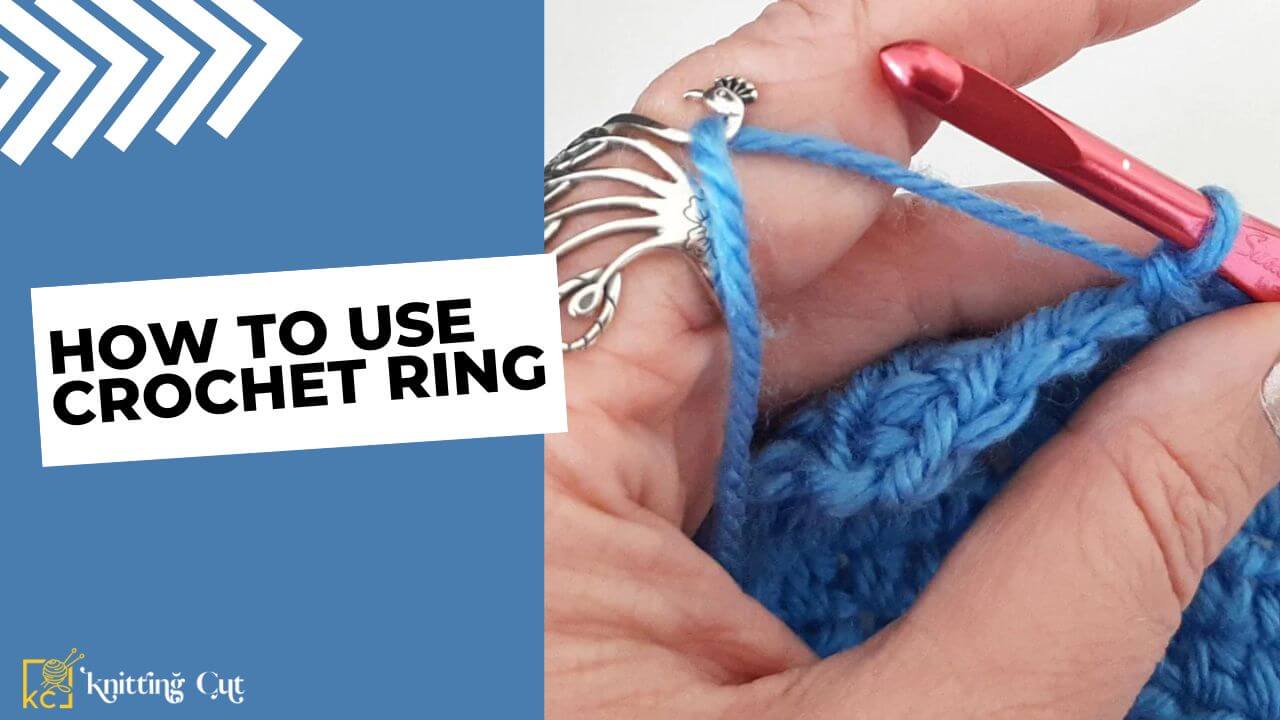
- Wearing the Ring: Slip the guide ring onto the middle finger of your nondominant hand, with the loop of the ring pointing upward.
- Threading the Yarn: Pass your yarn through the loop of the ring. As you continue knitting or crocheting, the yarn will smoothly glide through the loop, keeping it in place.
Pro Tip: It might feel a bit awkward initially, especially if you’re new to crocheting. Practice and persistence will help you get accustomed to using the yarn guide ring.
Yarn Guide Ring Options and Pricing
The good news is that yarn guide rings are both inexpensive and widely available. You can find sets with various designs and styles, catering to different preferences. The affordability is exemplified by sets like the peacock guide ring, which often includes additional items like crochet hooks, all for under $6.
Shopping for yarn guide rings is made easy with numerous options on Amazon, providing convenience for those who prefer online purchases.
Adjusting the Guide Ring to Fit Your Finger
Proper adjustment of the guide ring is crucial for a comfortable and effective experience. Follow these steps for optimal placement:
- Finger Placement: Wear the guide ring on the middle finger of your yarn-manipulating hand, typically the nondominant one. Ensure it sits just below the second knuckle.
- Ring Orientation: Position the ring so that the loop faces up toward you and out toward the end of your finger. This allows for stability and prevents slipping.
- Customization: Most guide rings are adjustable. For example, the peacock guide ring can be easily resized by gently pushing or pulling on the sides. Experiment with adjustments until you find the perfect fit.
Benefits of Using a Crochet Tension Ring
Crochet tension rings offer a range of advantages, making them a valuable tool for crafters, particularly beginners:
- Consistent Tension: A tension ring helps in achieving and maintaining a uniform tension, crucial for projects that require precise stitch counts per inch.
- Improved Stitch Quality: By preventing overly tight or loose stitches, the tension ring ensures the creation of neat, evenly sized stitches, enhancing the overall appearance of crochet projects.
- Easier Stitch Control: The ring provides enhanced control over the yarn and stitches, allowing for quicker and more precise crocheting.
- Improved Comfort: Crafters experiencing discomfort or finger cramps can benefit from using a tension ring. It reduces strain and fatigue on the hands and wrists during extended crochet sessions.
- Protection: In addition to assisting with tension, the ring acts as a barrier, protecting the finger from yarn burns—a common woe for avid crocheters.
- Helpful for Beginners: Beginners struggling with maintaining consistent tension find the yarn tension ring immensely helpful. It boosts confidence and facilitates the learning process.
Guiding Your Yarn Through the Loop
Now that your guide ring is in place, it’s time to thread your yarn through the loop. This step is essential for the smooth functioning of the guide ring.
- Thread the Yarn: Carefully pass your yarn through the loop of the guide ring. No need for complicated maneuvers—simply let the yarn rest casually in the loop.
- Adjust for Yarn Thickness: The ability of your yarn to glide through the loop depends on its thickness and the size of the loop. A variety pack of guide rings with different loop sizes can be beneficial, offering flexibility to match the ring to your yarn.
In conclusion, yarn guide rings are a handy addition to your crafting toolkit. With a bit of practice and the right adjustments, these rings can make your knitting or crocheting experience more enjoyable. So, if you’re ready to elevate your yarn game, consider giving these charming and practical accessories a try.
Read More: How To Do An Increase In Crochet