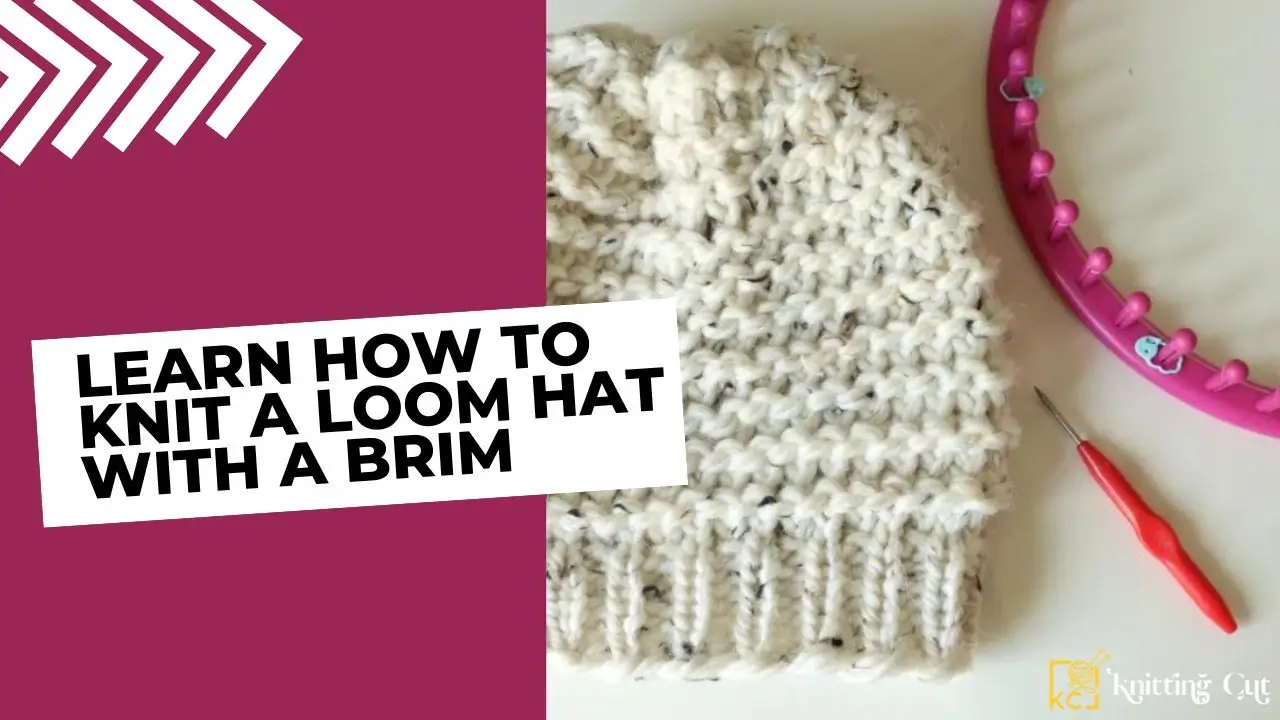
Have you ever wanted to knit a hat on a loom, but wanted it to have an extra special touch? If so, adding a brim is the perfect way to make your hat stand out from the crowd. In this blog post, we’ll walk through how you can easily knit a loom hat with a brim.
Gather Your Supplies
The first step in knitting any hat is to gather the supplies you need. For knitting a brimmed hat, you’ll need a knitting loom, yarn of your choice, and an appropriate hook. Depending on the size of your head, you may also need more than one skein of yarn. It’s always best to err on the side of caution and use more yarn than needed in case of mistakes or if your design changes mid-project.
Cast On And Start Knitting
Once all your supplies are gathered and ready, it’s time to cast on. This means that you will wrap the yarn around each peg until there is one loop per peg in the loom. After casting on is complete, begin the knit stitch by wrapping each peg counterclockwise once with the working yarn before passing it over itself twice and pulling it off completely. Continue until every loop has been worked in this manner until all pegs have been used up. When finished, cut off any excess yarn left over from casting on and secure it with an anchor knot so that none accidentally unravels during knitting.
Knit The Brim
Now for the fun part. To add a brim to your loom-knit hat, simply knit two more rows after completing your initial knit round above you should now have three complete rounds. For these two additional rows, skip every other peg as you work around to create some negative space between stitches. This will give your brim some definition as opposed to just being flat against your head when worn. Once finished with those two rows, continue knitting until the desired length is reached before beginning decreases for shaping the crown at the top of the hat.
Also Read: How To Rib Knit – Rib Stitch for Beginners
Essential Steps For Easy Loom Knitted Hat With A Brim
Loom knitting is a fun and easy way to create handmade items such as hats, scarves, and blankets. A loom-knitted hat with a brim is a simple project that can be completed in a few hours, making it a perfect weekend activity. Here’s a step-by-step guide to making your loom-knitted hat with a brim:
Choose your loom
You will need a round loom with pegs that are spaced close together.
Select your yarn
Choose a worsted-weight yarn that is soft and warm, such as acrylic or wool.
Cast on
Wrap the yarn around the first peg, then wrap it around the next peg, and so on, until you have wrapped the yarn around all the pegs.
Knit the brim
Use the knit stitch to create the brim of the hat. Knit around the loom for several rows until the brim is the desired width.
Increase for the crown
To create the crown of the hat, you will need to increase the number of stitches. To do this, you will alternate between two pegs, one peg from each end of the loom until you have the desired number of stitches.
Knit the crown
Continue using the knit stitch to create the crown of the hat until it reaches the desired length.
Cast off
Once the hat is the desired length, carefully remove it from the loom and cast off the stitches.
Finishing
Weave in any loose ends, then turn the hat right side out and enjoy!
Conclusion
With just a few simple steps outlined above, anyone can learn how to make custom brims for their hats. Adding this extra detail can be just what someone needs to take their hat-making skills up another level – whether they are looking for something stylish or functional for the cold weather months ahead. So grab some supplies and get started today.
Also Read: How do You do a Slip Stitch in Knitting